Restoring cast iron is a very unique process. Today there are very many different ways to restore cast iron. The most common instructions of cleaning cast iron are fire tossing and self-cleaning oven. Personally, I do not recommend any of those ways due to the evidence I have seen in cast iron damage and also to the oven. Thus, depleting the value of your cast iron, especially if it's a collector's item.
One way to restore cast iron is through an electrolysis tank. Many people that I've talked to never heard of an electrolysis tank. The name sounds intimidating and building one can be twice as intimidating because of the resources needed to build an electrolysis tank.
What does electrolysis mean? Electrolysis means to break down. You’re using electricity to break down rust. Collectors use electrolysis to restore other items and not just cast iron. In my case, I only use my tank to restore cast ironware.
To build an electrolysis tank, you will need the following:
A strong trashcan. You will need a large sturdy trashcan that will not bend due to excess water and freezing temperatures.
Steel metal. There are different types of metal that you can use as well for building an electrolysis tank. You can use cheap metal cookie sheets from Wal-Mart, but they will not last very long due to the cheap metal they are made from. Also, stainless steel is the best type of metal to use for an electrolysis tank. I encourage anyone who builds an e-tank to check out the group, Electrolysis Tank Builders on Facebook. They have some of the best-documented information and people to instruct you on how to build your e-tank.
Manual battery charger. The best type of battery charger is the wheeled stand up the manual battery charger. Using an automatic will cause the battery charger to kick off.
Arm and Hammer Super Washing Soda. This is used to create an electrolyte.
Spring clamps
Insulated copper wires
Plank of wood
Steel wire. This is to hang your cast iron from the plank of wood.
--------------------------------
To build your tank, you will need to place your steel sheets inside your tank and clip them down using your spring clamps. I was able to use three cookie sheets, to cover all the areas of my cast iron. Do not allow the metal to touch each other.
Next you use insulated copper wires to connect each of your steel sheets. Your steel sheets become a sacrificial anode. When the electricity travels through the water, the rust breaks down and attaches itself to the anode. Do not allow the copper wire to touch your water. It’s best to connect the wires around the trashcan, rather on top of the trashcan.
Once your wires are connected to each anode, you will need to apply your electrolyte to the water, Arm & Hammer Super Washing Soda. For every 5 gallons of water you need ½ cup of washing soda. Mix the washing soda into the water for a minute. Washing soda helps the water to become a better conductor of electricity. This also creates a gas called hydrogen. This gas can explode if left inside near a flame. When building your electrolysis tank, you will need to have your tank in a well ventilated area and not around flame.
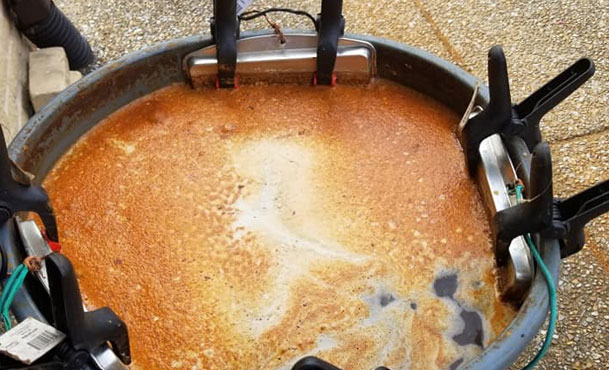
After the wires are connected to the anodes, place lumber across the trashcan. The lumber will be used to hang your cast iron. Slip metal wire through the handle of your cast iron, and twist around the lumber. Do not allow the cast iron to touch any of the anodes.
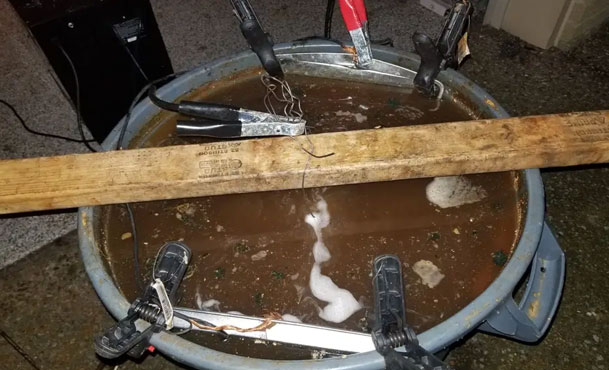
Connecting your electrolysis tank with your battery charger is rather a simple task, but please use caution in applying the cables to the anodes and the cast iron skillet. With the battery charger off, apply the positive charge to the anode (cookie sheet) and the negative charge to the cast iron skillet. After you turn your battery charger on to the lowest setting, you will see bubbles forming off the cast iron. Do not adjust any of the clips or any of the wiring while the charger is on.
The electrolysis process can take a few hours to several hours, depending on the condition of the cast iron skillet. Each person has their own way in constructing their electrolysis tank, but please use extreme caution while building your tank and educate yourself. There are several Youtube videos and a Facebook page devoted to those who want to know more about the process in building your personalized e-tank.